Tutorial How To
Stencil Template in Word
Create a simple design instantly with the stencil template.
To begin open a blank document in Word size 8.5x11".
Because our stencil is white, and our background is white, the first step is to add color so we can see what we are doing.
ADD SOLID COLOR
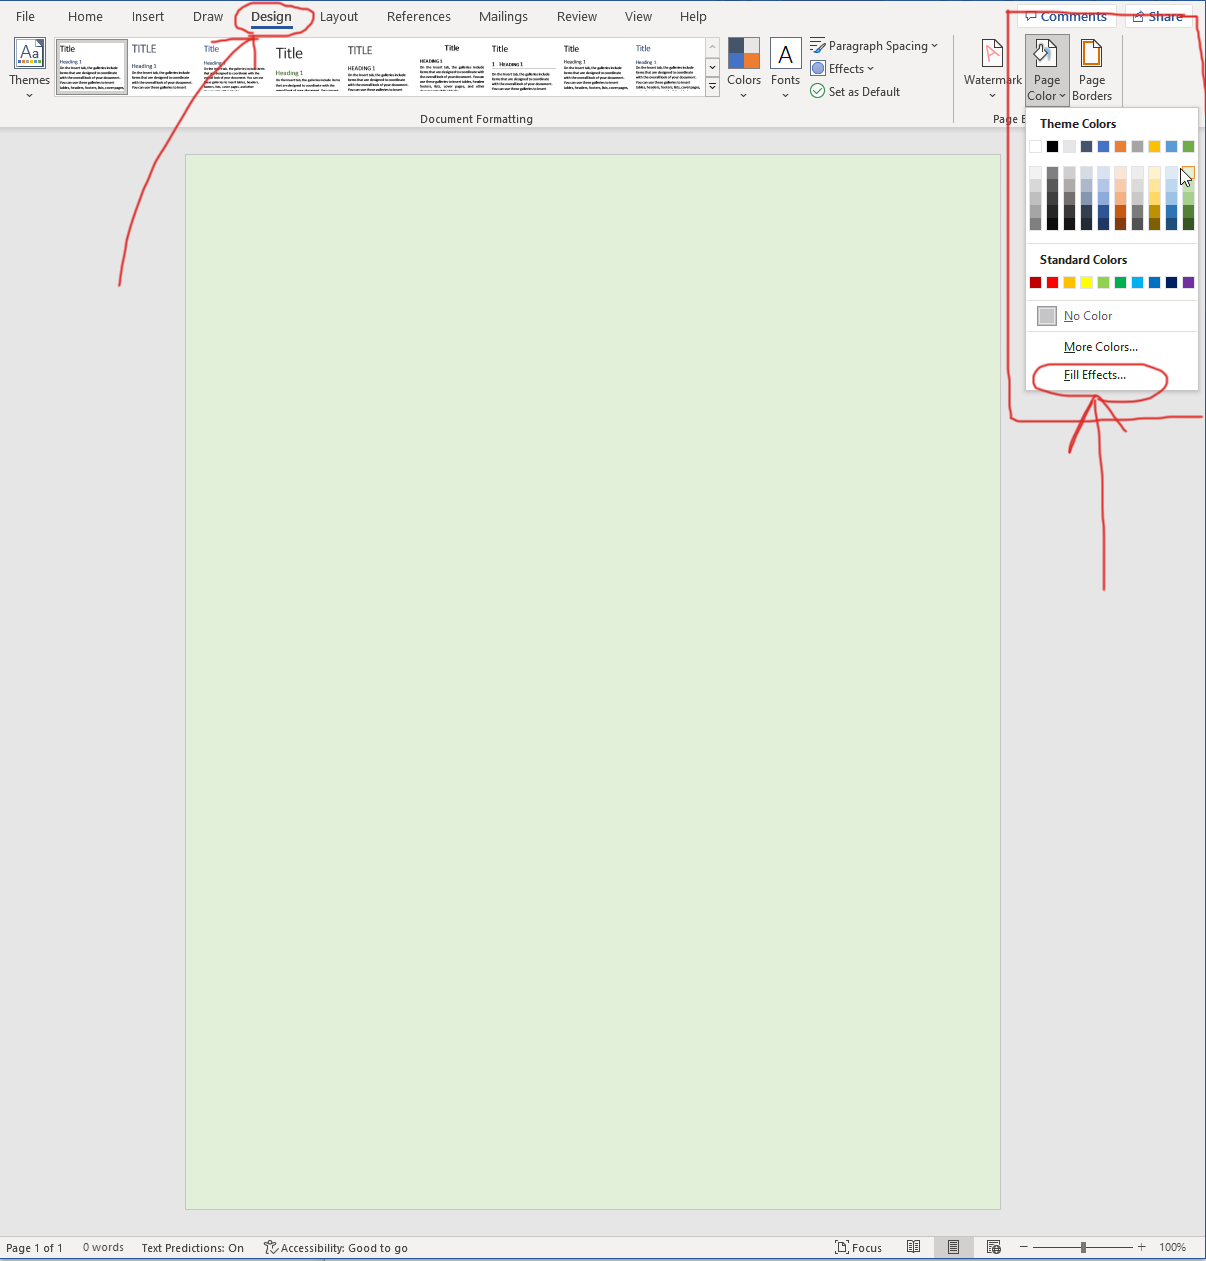
Go to Design in the top menu then Page Color. In the drop down menu you can select any color for your background. You can easily change this later by going back to the same menu options. See image on the right.
ADD PATTERN
Adding pattern as a background is a little trickier and we'll be covering another method below. But to set a pattern as a background you can use the fill effects option in the Page Color menu.
Add gradients along with pre-installed textures and patterns or a picture.
Using picture, a seamless pattern will tile it automatically, however, it doesn't give you an option to adjust tile sizing in the current version of Word.
If your pattern is too large (12x12") reduce it in size using an image editor. Depending on the pattern 2 or 3" is probably going to work better.
INSERT TEMPLATE
Now that we have some color on the background we can insert our template and we'll be able to see it.
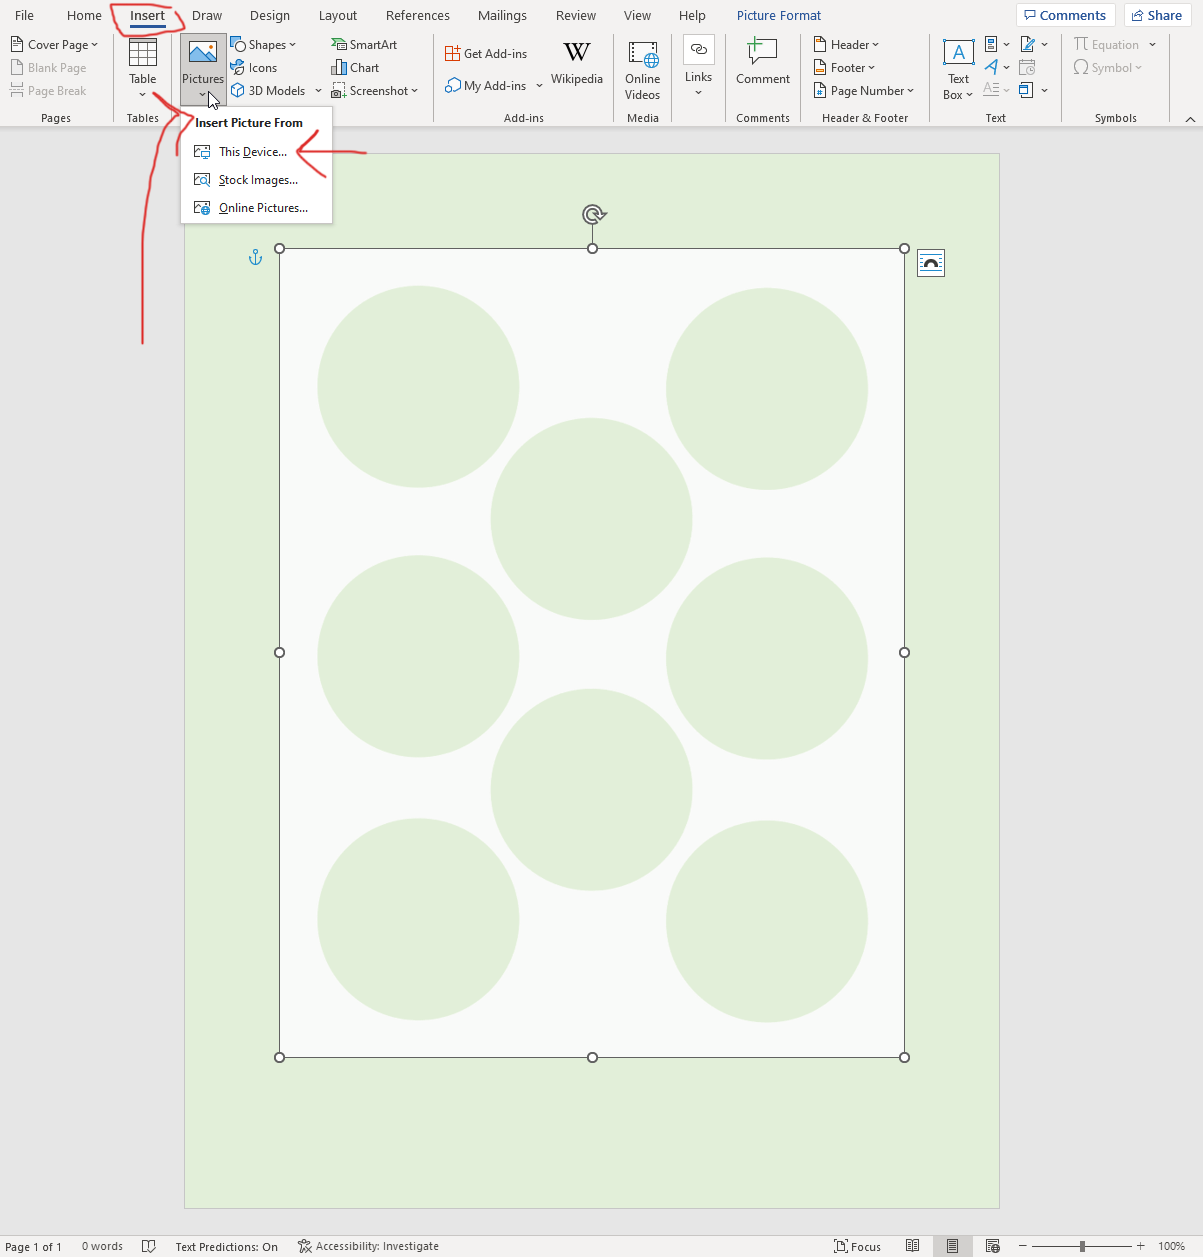
Go to Insert in the top menu then choose >Pictures>This device. Navigate to your template and be sure to choose the PNG file version that has the shapes as 'cut-outs' or 'windows'.
This template style acts like a stencil or pattern to create your design in.
Initially Word is going to place that template mid page and sized smaller than you'll want it. See image left.
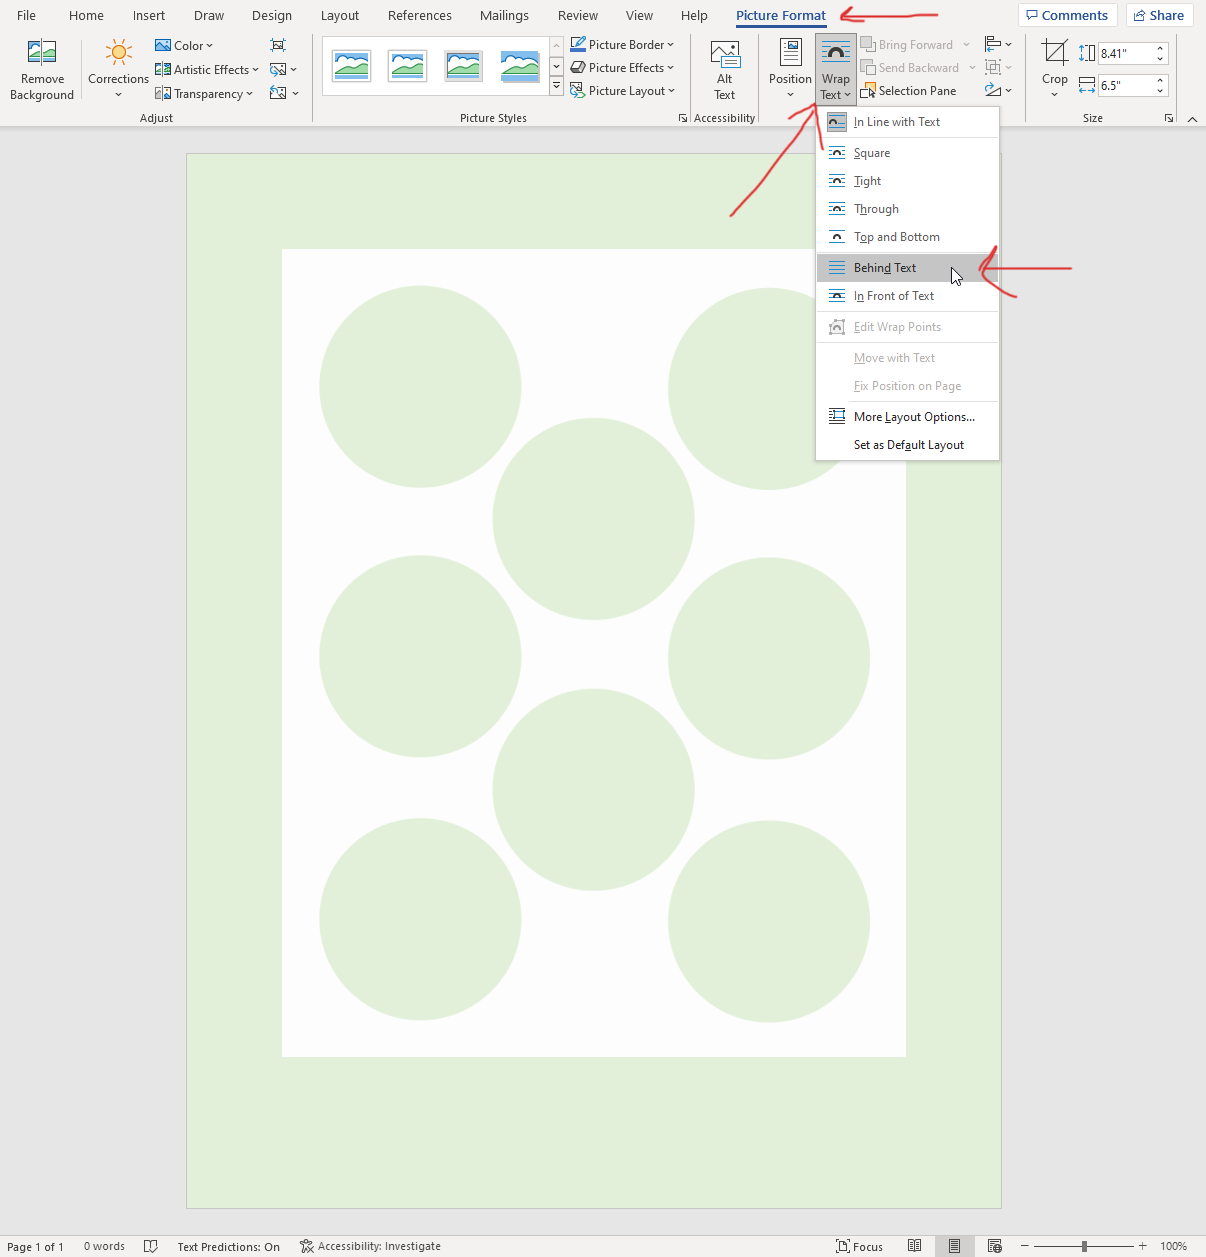
So you'll need to make a couple quick adjustments. With the template selected go to Picture Format in the top menu. Then in the Wrap text menu choose 'behind text'.
You'll now be able to resize the template to fit the page exactly by dragging each corner and moving the template into position. The sides will glow green when you have positioned it exactly to the edges.
See illustrations below for both steps. Now we're ready to design!
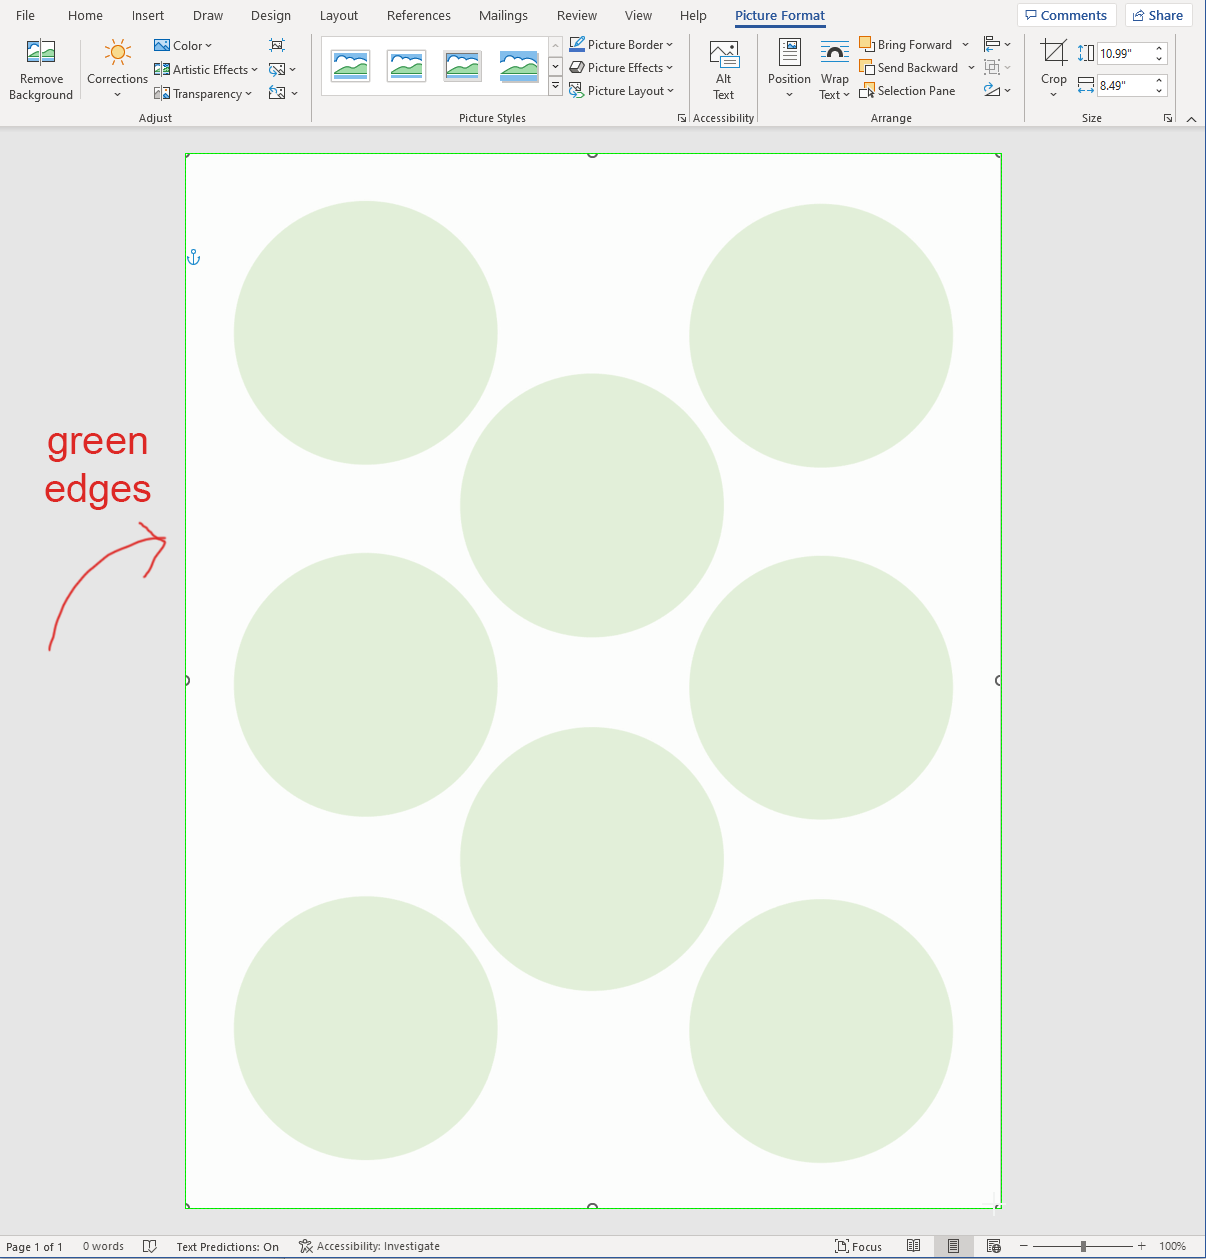
There are lots of different design options available at this point. The most basic of which would be to just use the solid background color as your base and now add text or graphics on top. I'll show how to add both of those elements below, but what if you want a more complex design or what if you want each shape to have a different design? Let's first try adding pattern to one of the circles.
For the first illustration below, I inserted a square paper pattern: Insert>Pictures>From this device - then I set it and resized it Picture format>Wrap Text>Behind text - resize and re-position on canavs - then Picture format>Send backward. As you can see, because this particular template has circles arranged diagonally, this method doesn't work well here. But it might work well for other templates and so it's an easy way to add pattern, images or graphics. Do this with any graphics you want to add, either under or on top of the template.
In the second illustration I'm more precise with adding the pattern. Using the shape tool I draw a circle over the top of my template. Go to Insert>Shapes>Basic Shapes>Oval and drag out a circle just a little bigger than the template. With the circle selected go to >Shape Outline>No outline. Then go to Shape fill>Picture. Navigate to your pattern or image and select. The last step is to Send backward so that the shape is under the template.
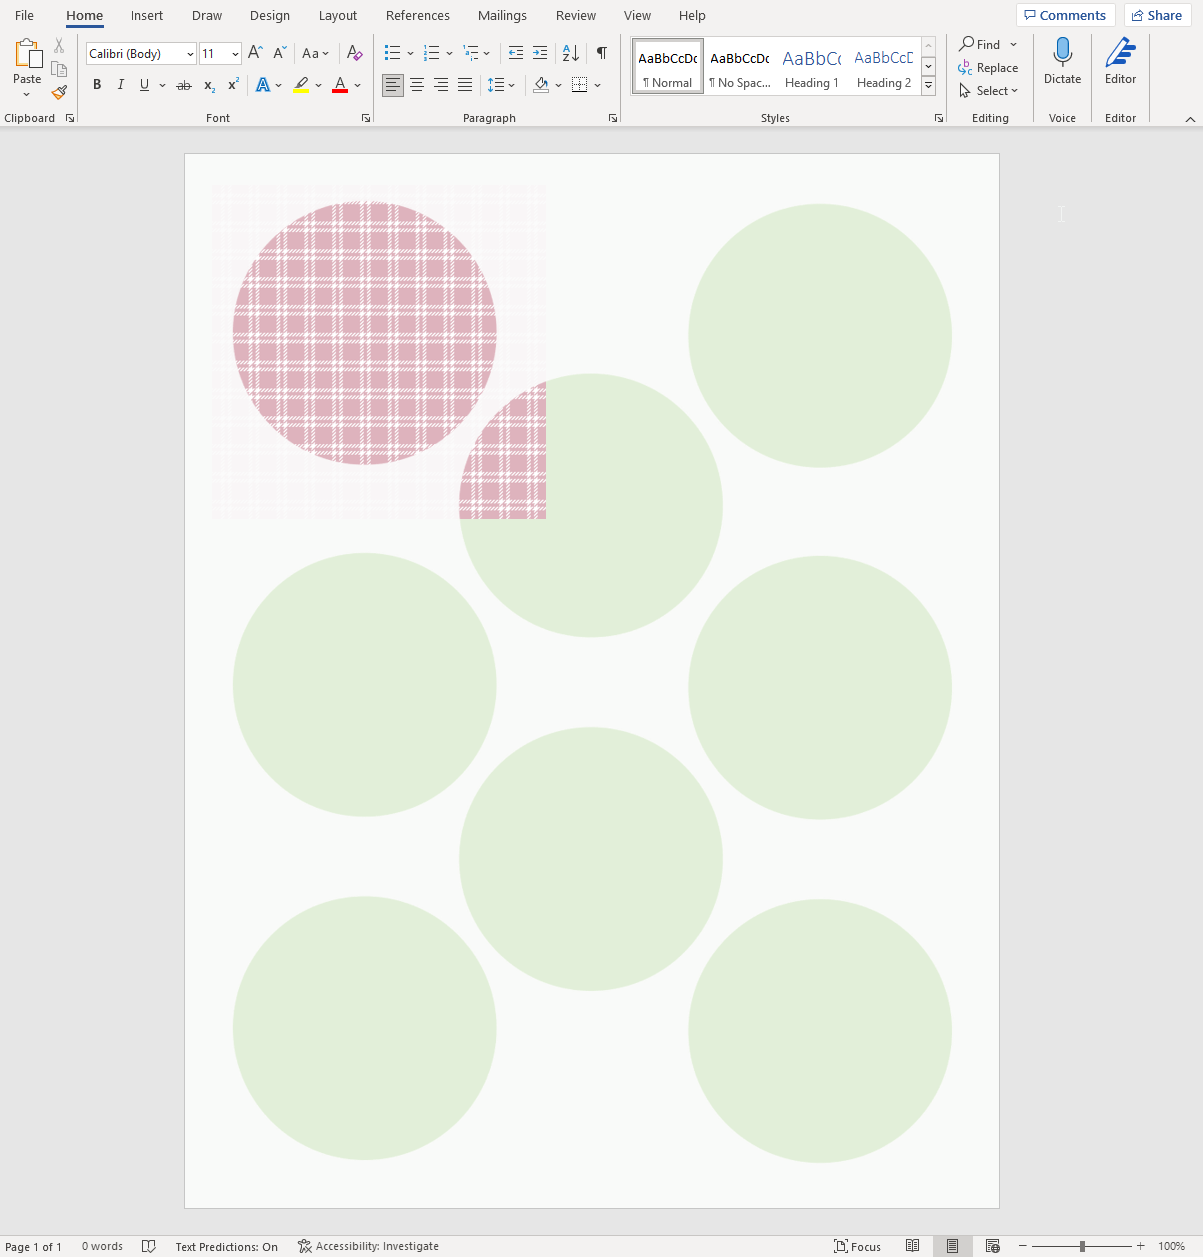
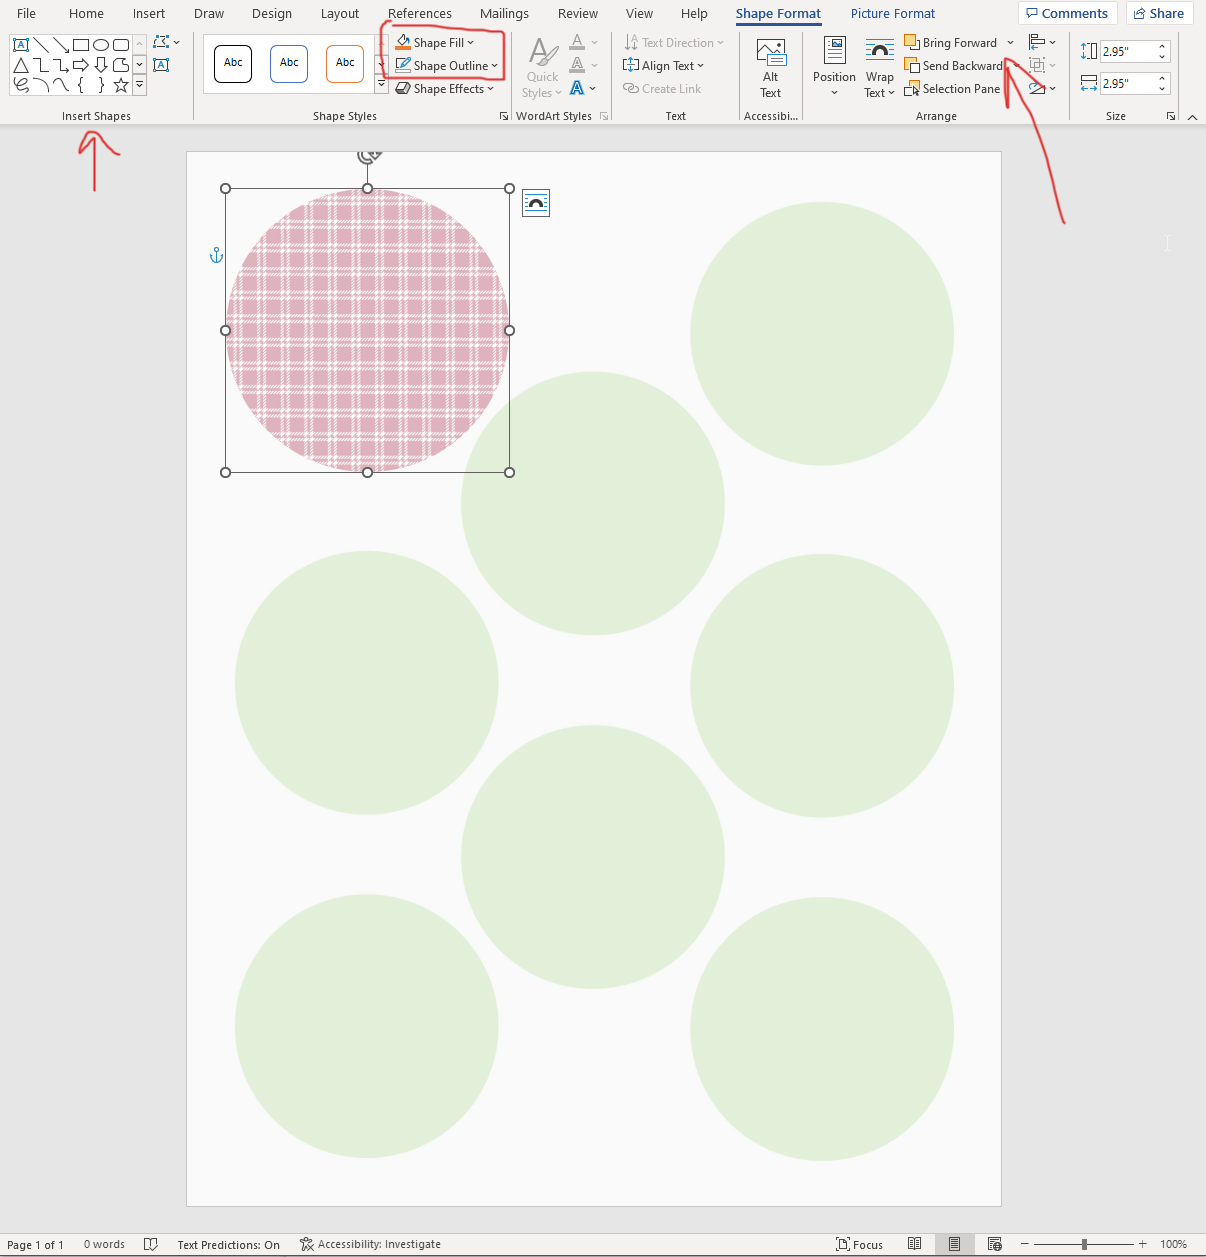
There are lots of different things that you can do just by playing around with the settings and tools. A tip to remember though is that when things get sent in behind other elements it can be difficult to re-select them. Word is not a graphic design program, so there are limitations.
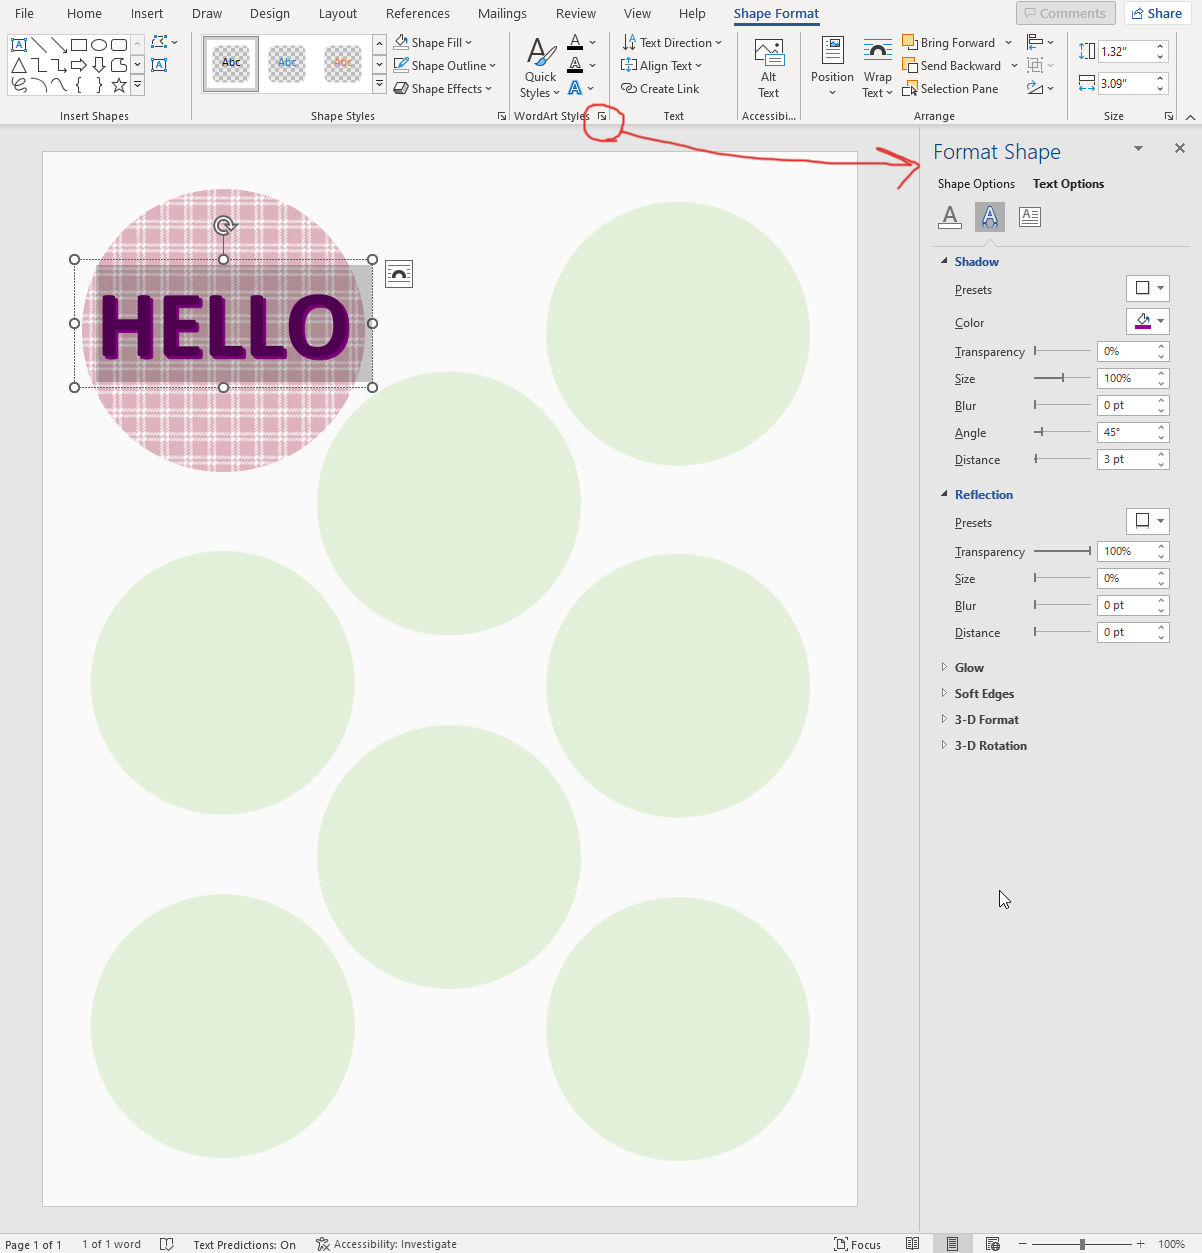
Now let's add some text. For this type of work you'll want to use the Word Art tool. The other text tools in Word are meant for document typing and are not as useful in a graphic design project like this.
Go to Insert>Text>Insert word art. Look for the angled A icon. In the text box add your text making sure to select Through in the text wrapping choices so that you can move the text box around.
The text box itself is now a shape and can be edited as such with outlines and color fills. When you highlight the text you'll get a pop up menu where you can make some simple changes to the font size and color. What you'll likely also want to do for more options is to expand the format word art styles box. Look for the little arrow in the bottom corner of that top menu section - see illustration right. Editing should be fairly self explanatory if you are a even somewhat familiar with Word in general.
Use all of the tools presented here to insert or edit per your requirements!
Happy designing!
Shawnna
