Tutorial How To
Changing Shape Colors
Edit template colors using the free online editor Photopea
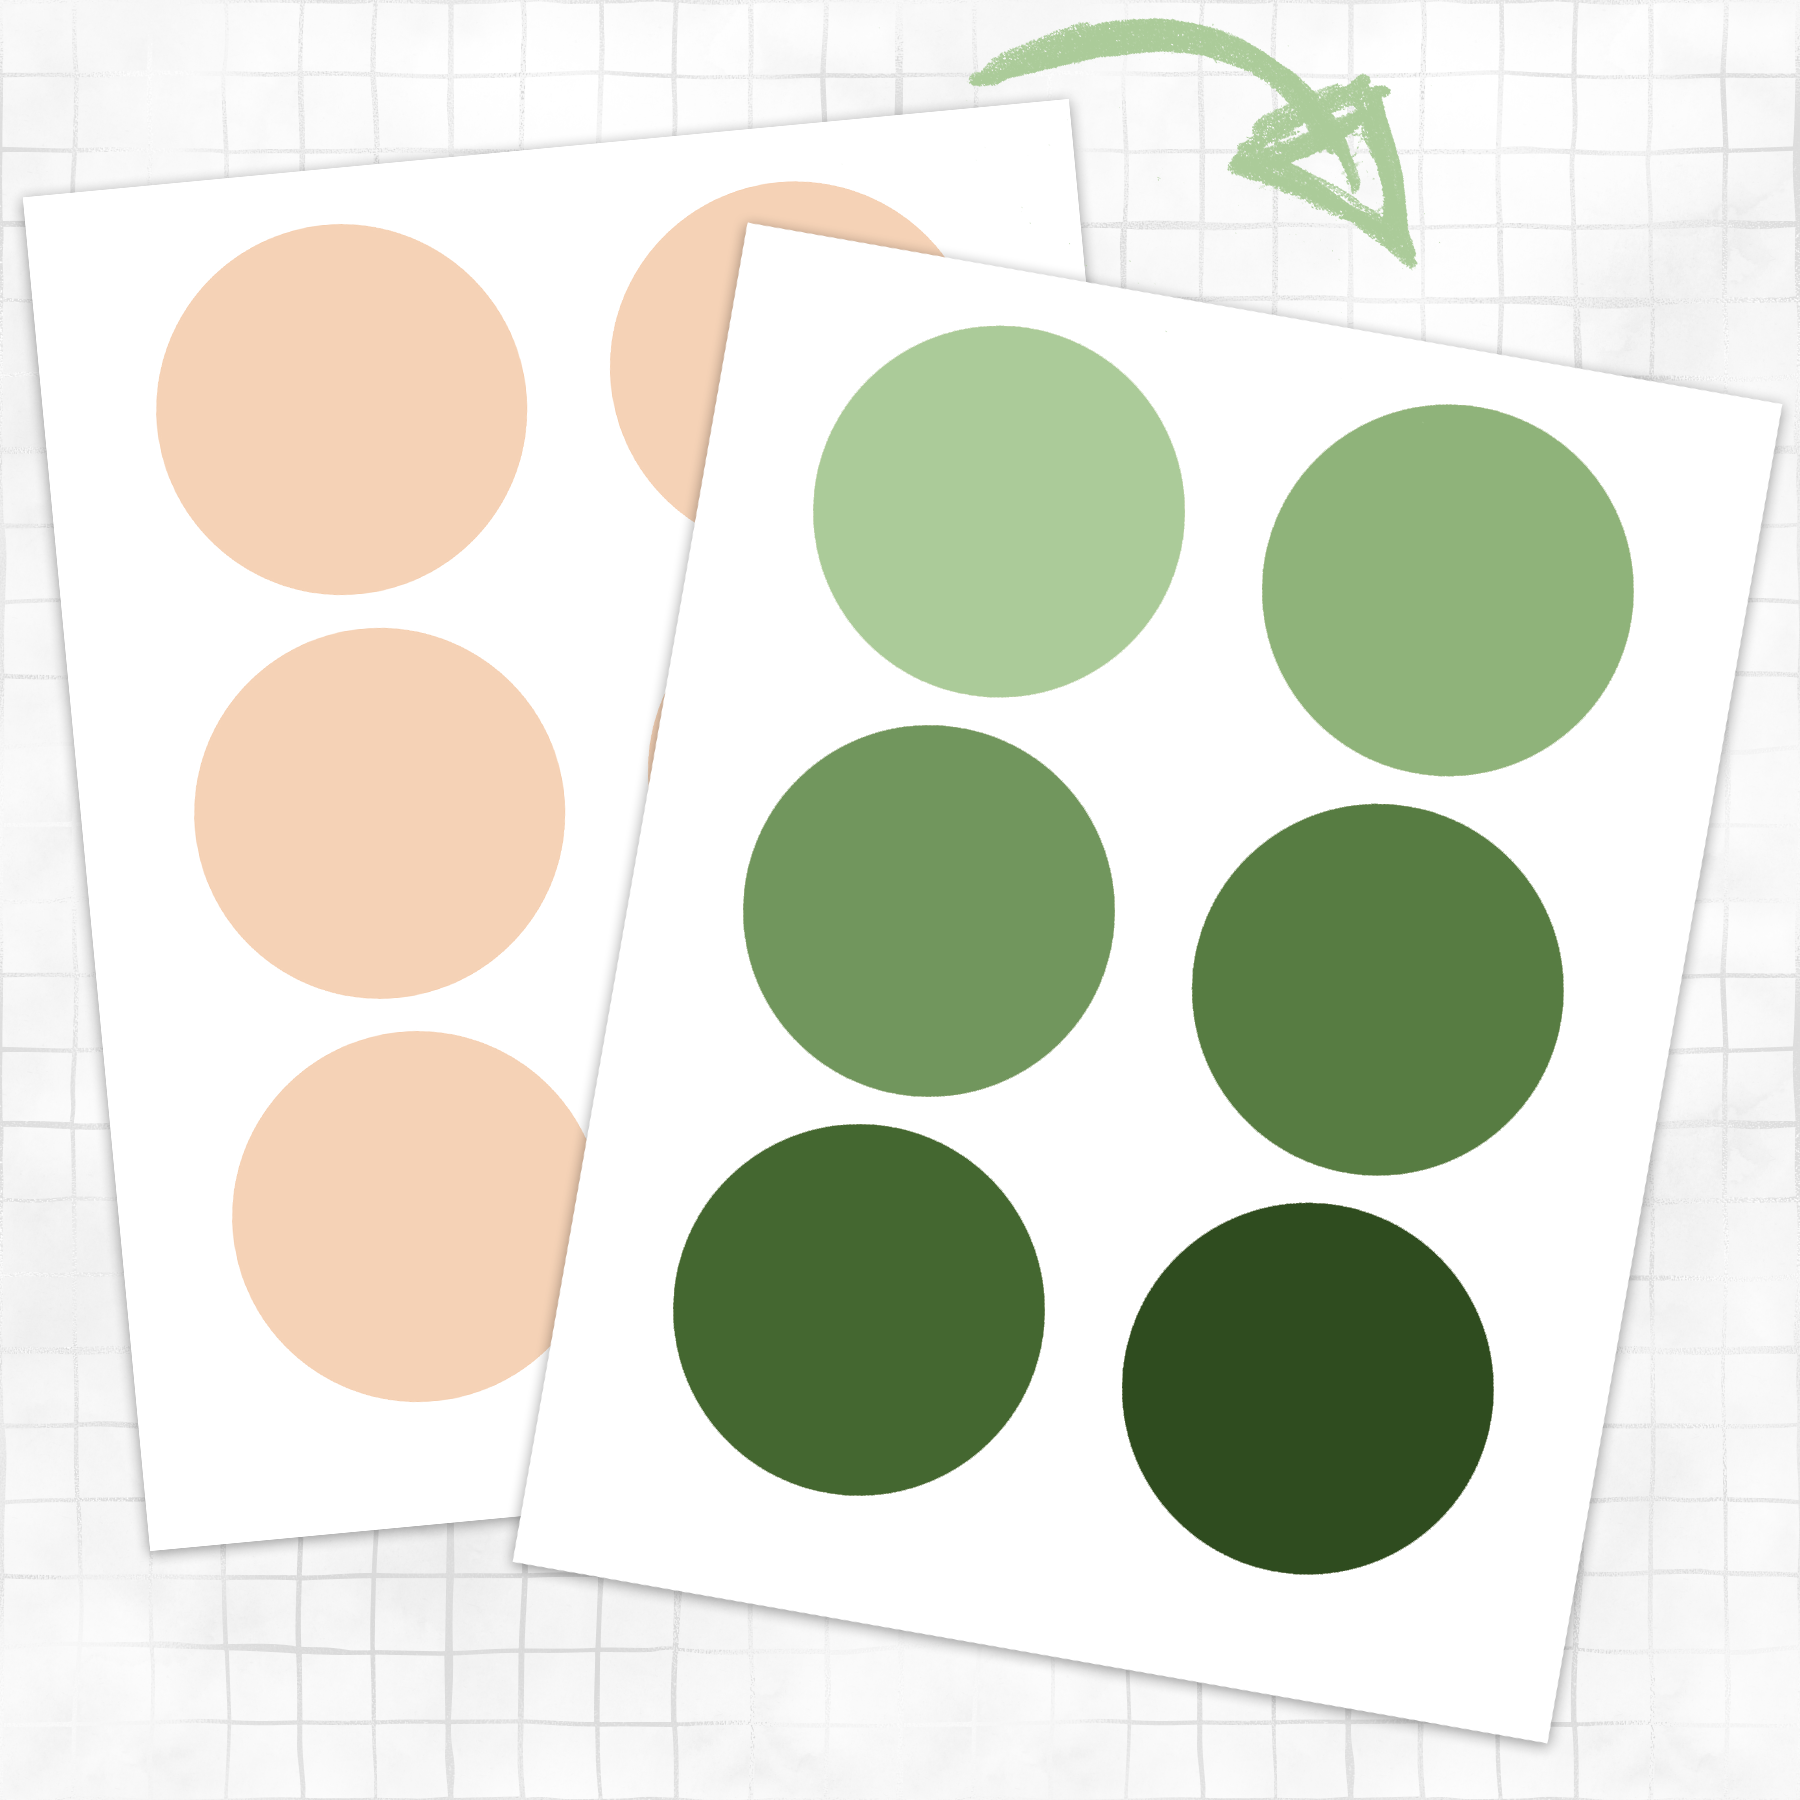
For projects that require custom colors you might choose to edit a template by changing the color of each object on the sheet.
Whether it's a single object or multiple shapes like the example on the left, the easiest way to change the color is by using a graphic design software program and one of the layered template options provided.
I offer both SVG and PSD as fully layered templates that can be edited with exact precision.
For this tutorial I'm going to show you how to change shape colors using the PSD file inside the free online editor Photopea.
Photopea is comparable to photoshop and is compatible with PSD file formats making it very quick and easy to edit any photoshop file - for free!
The process here is nearly identical to that of Photoshop itself so these steps very easily transfer over to both Photoshop CS and PS Elements.
To get started, have your template ready, open your web browser and navigate to Photopea. (this is more easily done from a desktop computer)
STEP 1:
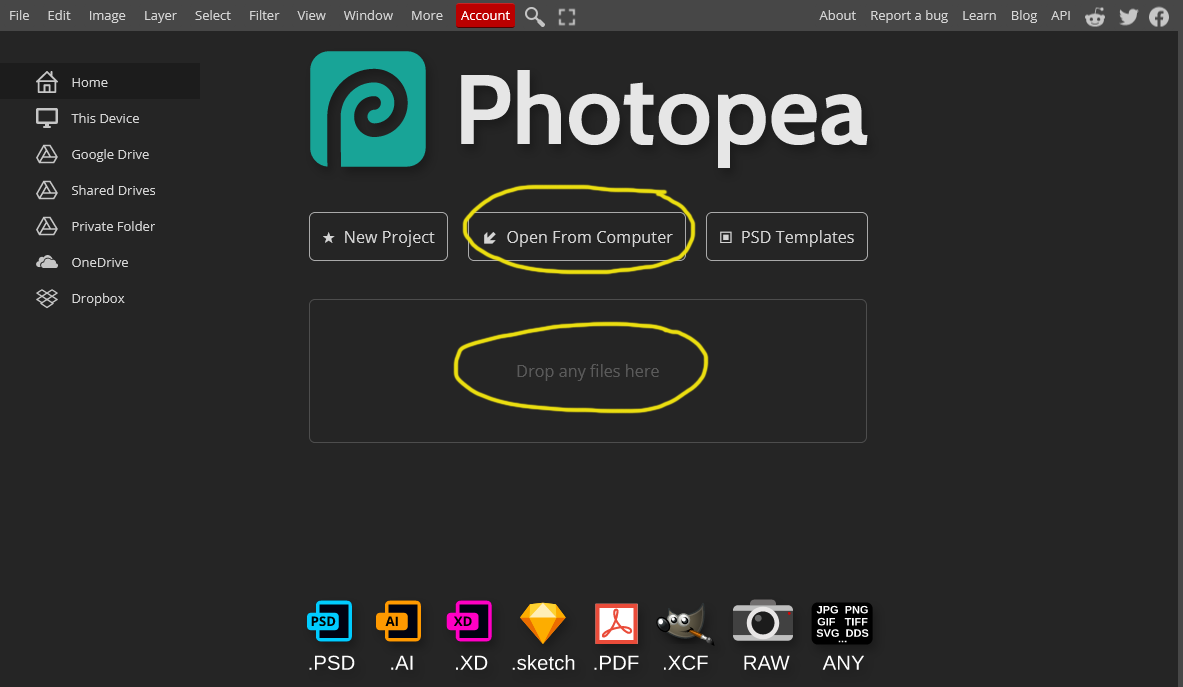
Photopea's home page should look like this when you first open it.
Either click "open from computer" to locate and load your PSD template file, or drag and drop the file onto the center of the screen.
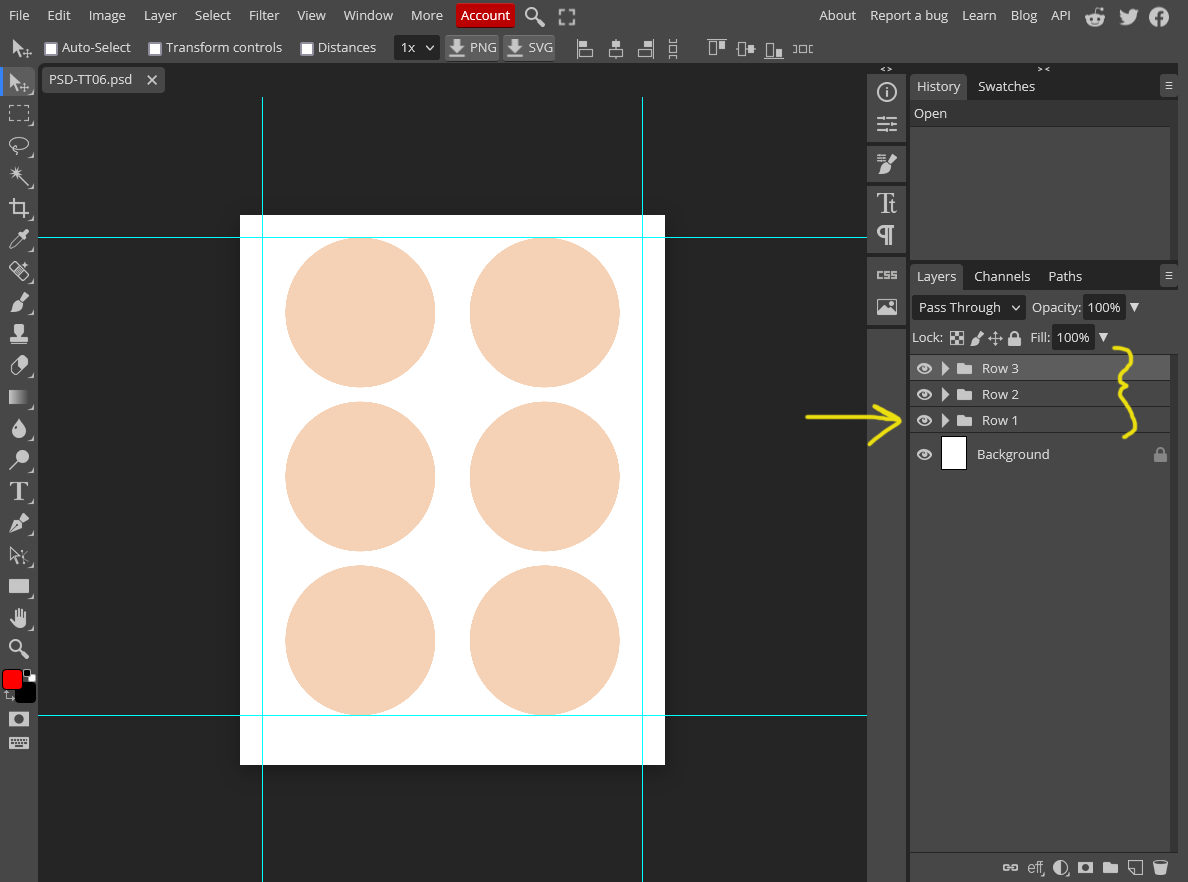
This will open the file in Photopea and your screen will change to the example below.
Make sure that you have selected the right file by ensuring you have multiple layers in the lower right panel, as marked on the example below.
STEP 2:
Layers are likely to be grouped in folders if there are many layers to the template. Each individual shape represents a separate layer in the file.
In this example there are 6 circles, so there will be six shape layers, which are organized here by row into 3 folders.
To open the folder just click on the little arrow icon next to the folder icon.
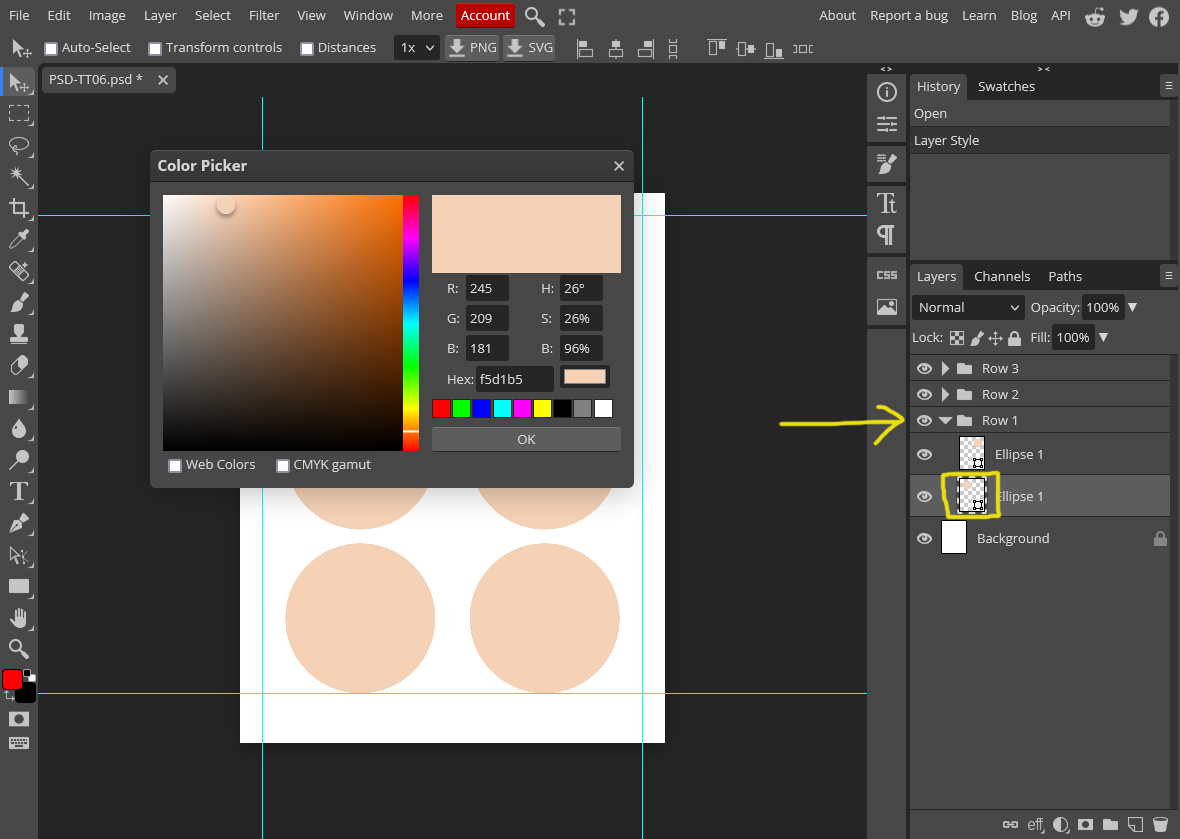
Do this now for all three rows so you can see each circle shape as a separate layer. Click once on a shape layer to select it and notice what happens on the canvas. A blue line will appear on that circle indicating it has been selected.
Double click that same shape layer in the layers panel and a color picker box will appear over top of the template canvas.
STEP 3:
This is what your screen should now look like.
This is where you'll select your new color. Just choose a color using one of the color picker methods and click 'OK' to apply the change.
There are a few options here for color selection. If you have the exact color code you want to use, you can enter it in the HEX or RGB value boxes.
You can also use the slider to randomly pick a color you like if it doesn't need to be exact. You have a pretty broad range to choose from here.
You'll notice two tick boxes for web colors and cmyk gamut. Only use these if you know for certain you need this, otherwise the default RGB colors will be perfectly suitable for any project in web or print designs.
SIDEBAR: Color Picker Eyedropper
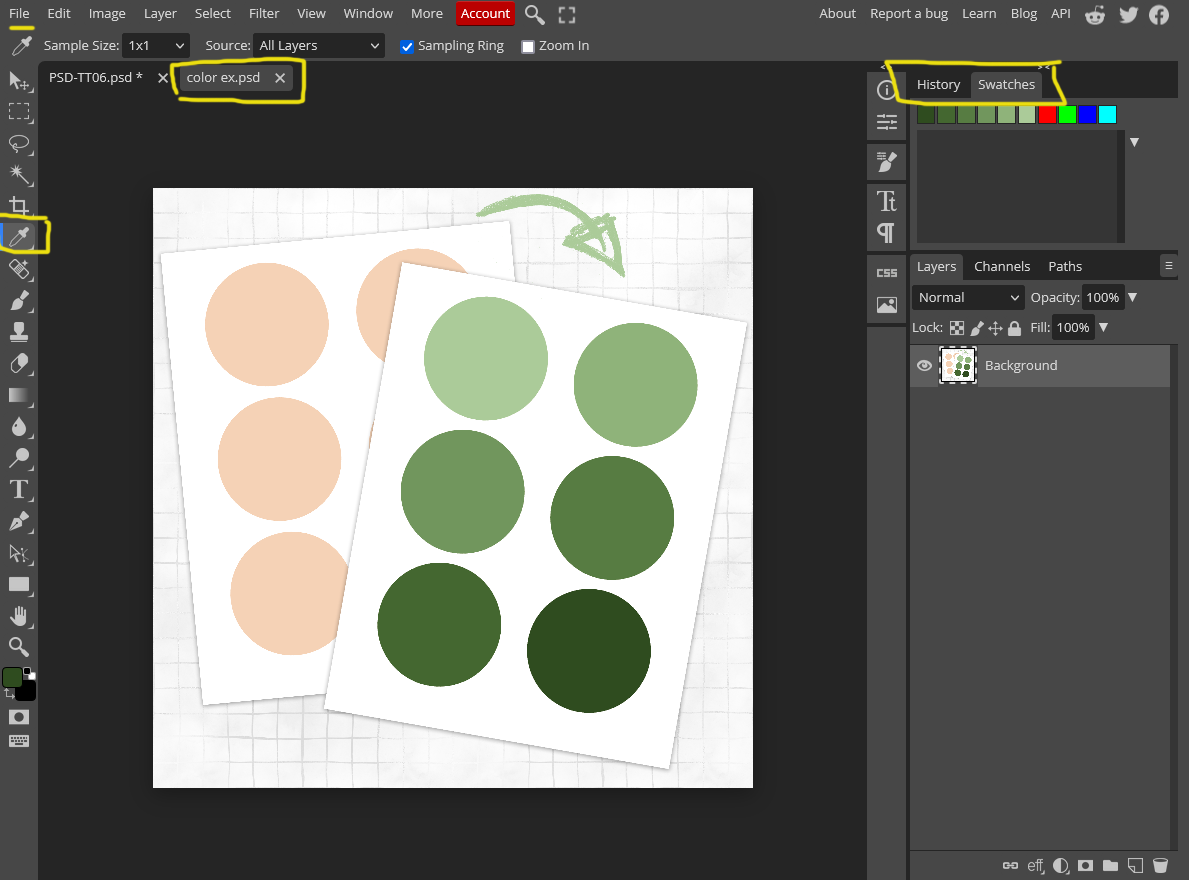
I'm going to pause on the instructions to explain the eyedropper tool, because this is a most handy option for picking color options.
If you have a color palette in image form that you want to use, or you want to pull colors from another design or a photo, go to File>Open on the top menu bar and open that image in Photopea.
The image will open in a new tab. From the left hand tools menu, select the eyedropper tool. And from the top of the right hand panels, select Swatches.
Now just click each color, one at a time, and each one will be added to the swatches panel.
Close the color palette image by clicking the X in the tab at the top of the canvas area.
STEP 4:
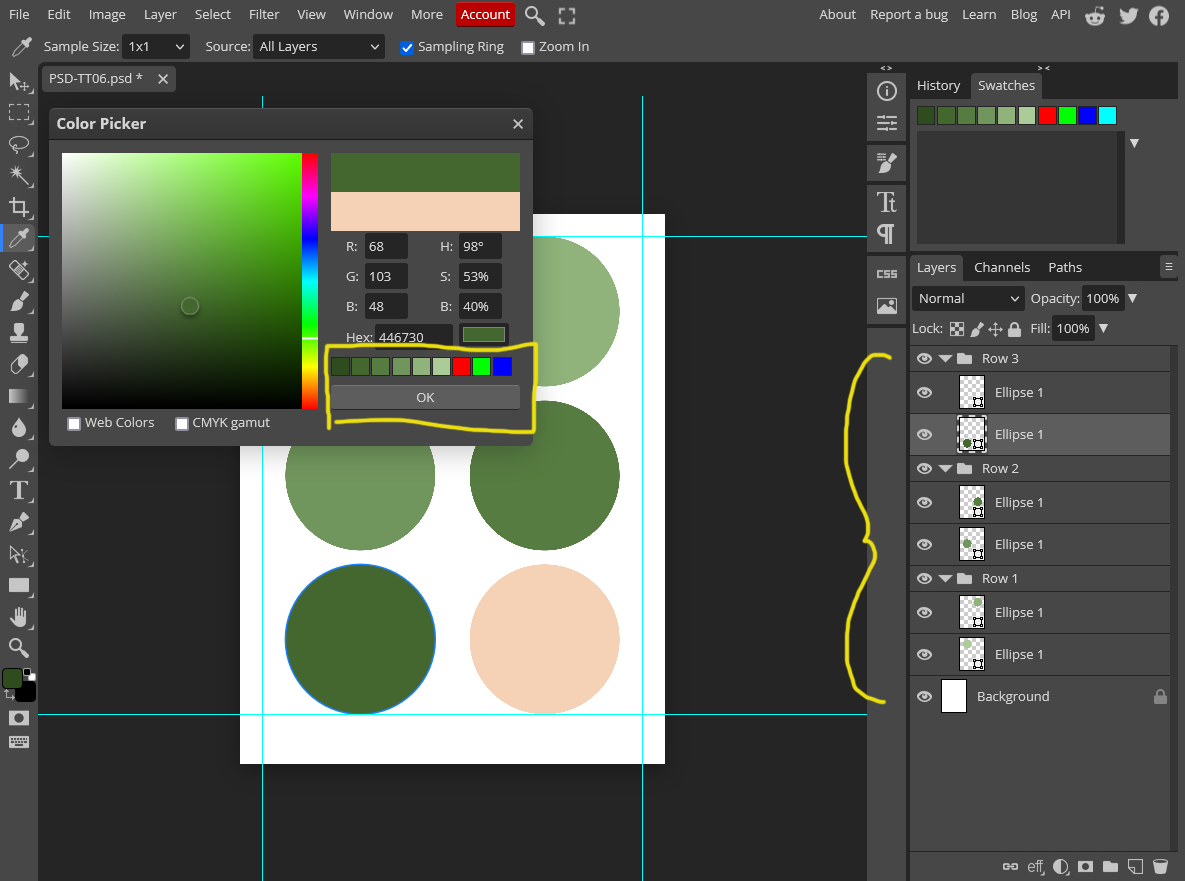
Resuming where we left off at Step 3, if you've set up custom color swatches these will now be available right in the color picker menu box.
All you have to do is click the color choice you want for each shape and click 'OK' for it to be applied to that shape.
And so on for each shape.
You can also click the color choice from the Swatches panel itself, if your colors are not all shown in the color picker menu box.
Once you have changed your colors you can either continue designing in Photopea or you can save and download your new changes as a new file.
STEP 5:
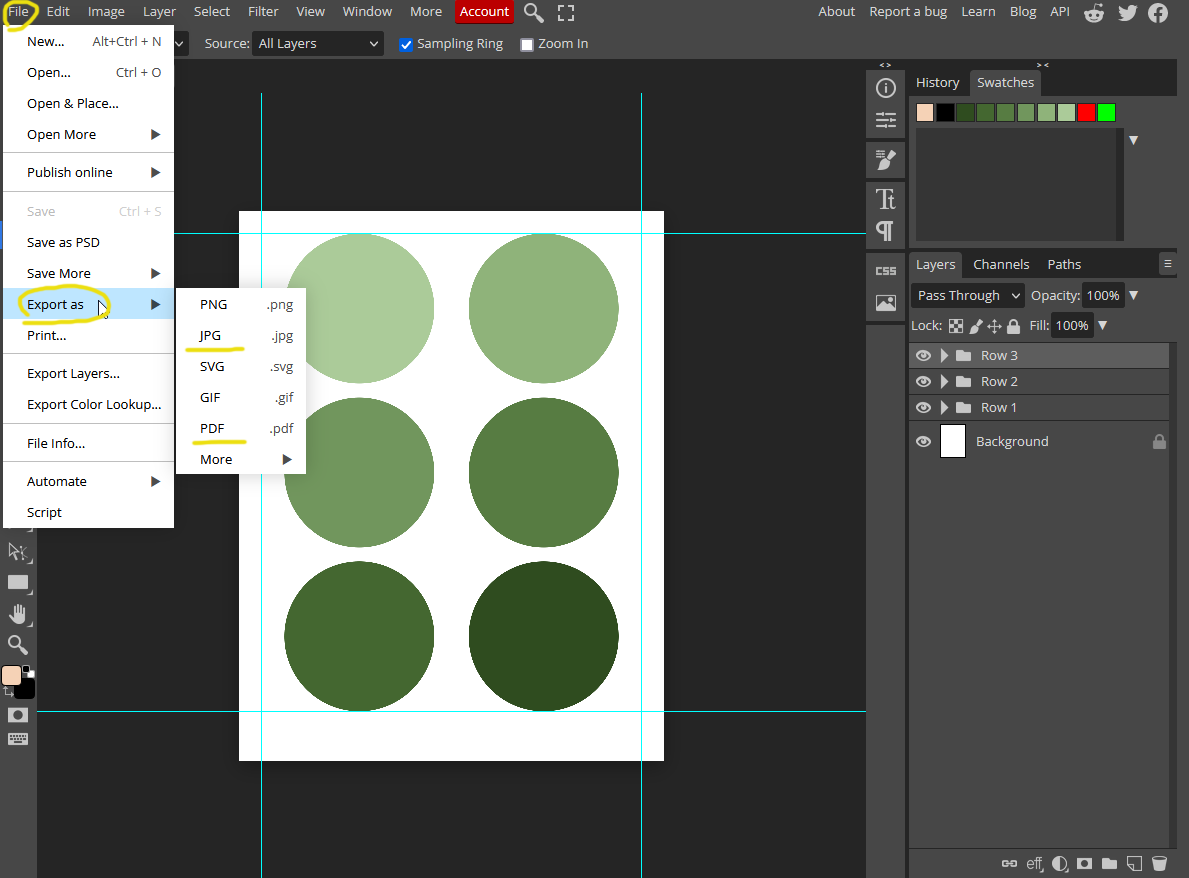
To save as a JPG or PDF for printing purposes, simply go to File>Export as and choose your preferred file format.
A pop up will appear with saving options such as file name and image quality. Make any necessary adjustments and click Save. The file will automatically be sent to your downloads folder.
If you want to save as PNG with a transparent background you will first need to turn off the white background layer. In the layers panel, click the eye icon to turn off a layer.
Now save as above but choose the PNG file option. In the saving menu box, leave all settings as they have defaulted with the exception of the file name should you wish to change that. Everything else should be left as is.
And done!